Simcoe Skies Astronomy
PICfocus Electronic Focuser - Circuit & Assembly
(click images for larger view)
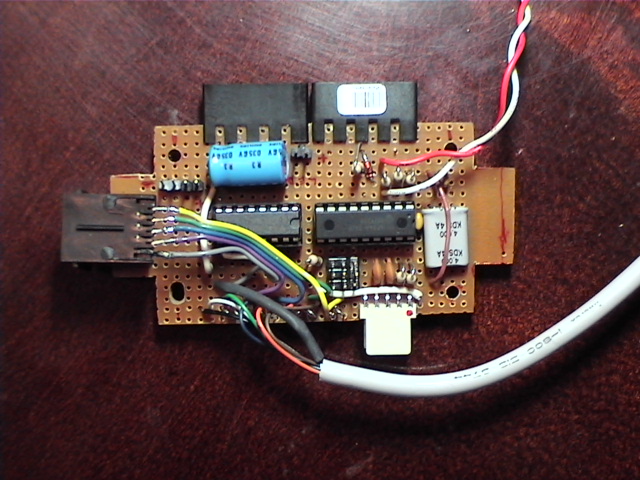 |
I used standard prototyping circuit board for this, and hacked the corners to fit into a
compact plastic project box. I tried to keep "hanging wires" to a minimum - the ones that you see here are
for the hand controller (half of a ps2 mouse cable extension) and the limit switch (wire has a plug on the end
which connects to pins on the limit switch) The other connectors are as follows:
|
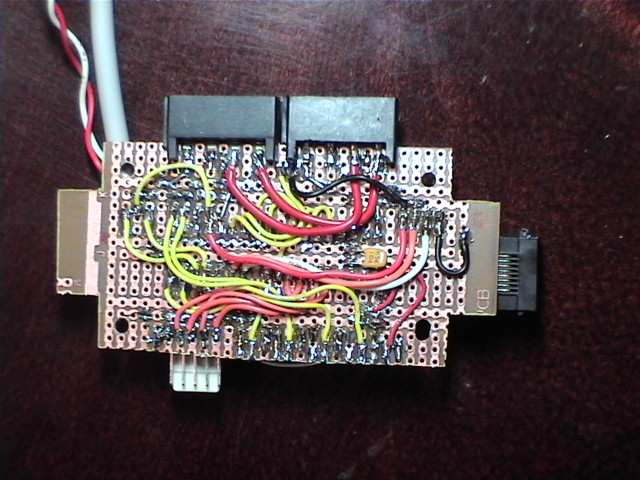 |
Not a lot of wire connections here. Most of the connections are made via the circuit board, with a generic conductor layout, which is ideal for DIP ICs. Be cautious with the Xtal mounting, I didn't leave enough clearance above the board, and as a result, pulled too hard on one of the leads when I bent it over. This caused a GREAT deal of grief and troubleshooting time - finally I replaced it, without realizing what had happened until afterwards. A lesson learned the hard way! |
 |
Here's the board mounted inside the project box. I used a "nibbler" tool to make the square cutouts. Mental note: put protective paper on (a sticker or something) next time to protect the surface from being marred by the nibbler. You can see the PS2 connection and the connector for the limit switch, as well as the LED mounted in the box lid. The PS2 connector has the added benefit of neatly unplugging without tearing the thing apart, in the event that someone trips over the cord. |
 |
Here's the box with the lid on. Measurements: 2"x4"x1.125" - Not bad, plus it matches the decor (the dew heater controller is in a box of the same style)! |
 |
This picture shows the stepper motor connector. Oddly, the coil sequence is not "inline" across the stepper's connector - the sequence is 1,3,2,4 for my particular motor. Be sure to set it up so your motor is stepping smoothly in sequence and not breakdancing on your OTA. |
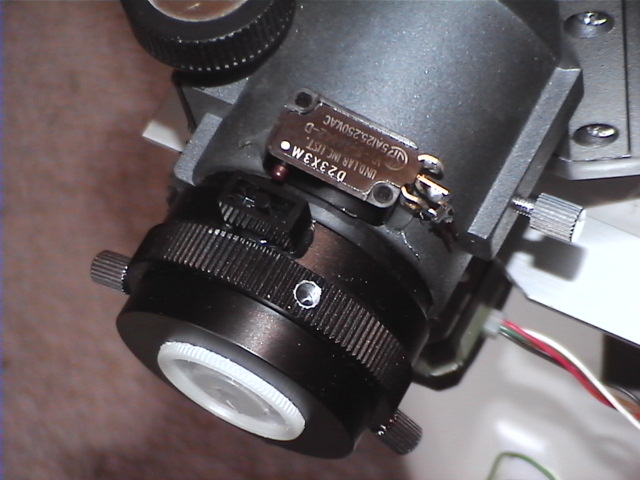 |
I mounted the limit switch using a glue gun. The piece that presses on it when the drawtube approaches it's maximum inpoint is a 1x2 LEGO block, also attached with a glue gun. The limit switch wire isn't plugged in for this shot, and you can't really make out the 2-pin connector soldered on the limit switch connections, but it's there. |
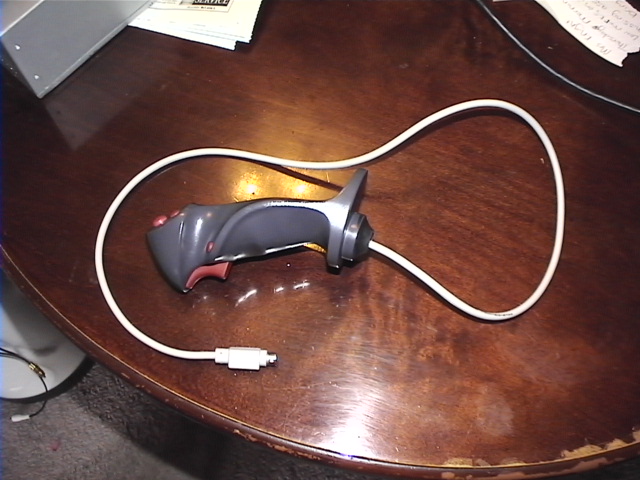 |
Naturally, the handbox can be constructed of anything - but I had an old Logitech "Wingman Extreme" analog joystick kicking around in my junkpile, so I decided that it was time it was reincarnated in something useful. This worked out really well, since it's MADE to fit the hand. I removed the HAT assembly and stuck a piece of black electrical tape over its hole, and then just used the four main buttons (trigger=mode, lower handle button=preset, two thumb buttons=out, in). The cord is the OTHER end of the PS2 extension cable - and I use a complete 10' extension cable between this end and its counterpart (attached to the controller box). |
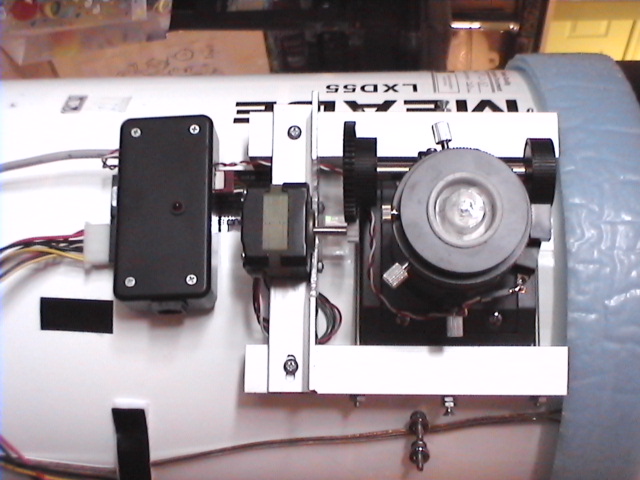 |
This is a shot of the complete assembly. The motor sits on the L-stock rail, and the control box is velcro'd to the OTA nearby. The heat from the energized stepper should keep dew and frost at bay so that it doesn't rust. |