After taking the plunge into astrophotography, I quickly found out that the forgiveness that I'd experienced so far with inaccurate polar alignment and the fact that my scope was used on the back deck - was over. Imaging involves time exposures - where polar alignment errors are evident in star trails, and any movement on the deck results in a "throw-away" frame. Once I achieved a reasonably good polar alignment, I was forced to stay outside and couldn't retreat to indoors to warm up or grab a snack because my own weight on the deck would shift my alignment.
The only solution I could think of for this problem (without relocating my setup, which was conveniently close to the house and would permit remote control from inside) was to construct a through-deck pier. This pier would have the following benefits:
- Provide a more stable base for winter, making shovelling the deck less arduous and critical
- Isolate the telescope from the deck, eliminating vibration and flex problems
- Greatly reduce setup time, eliminating the need to do drift alignment after initial polar alignment is marked using a laser pointer (which has now been epoxied to the mount)
- Get rid of the "I'm gunna hit the mount" Meade message worry
After chatting with various people about ideas, particularly the Yahoo LXD-55 group, I decided to take the plunge. With the ever-necessary spousal permission, I cut a hole in the deck (about 30-inches square, with a skilsaw), dug a 4-foot deep hole approximately 20-inches in diameter (with some brute force help from my father-in-law who happened to be visiting), and came up with plans for a pier that was subsequently made up for me by a friend. The most difficult part (apart from digging in our lovely clay) was how to marry up the pier to the mount and facilitate levelling.
See images below for reference
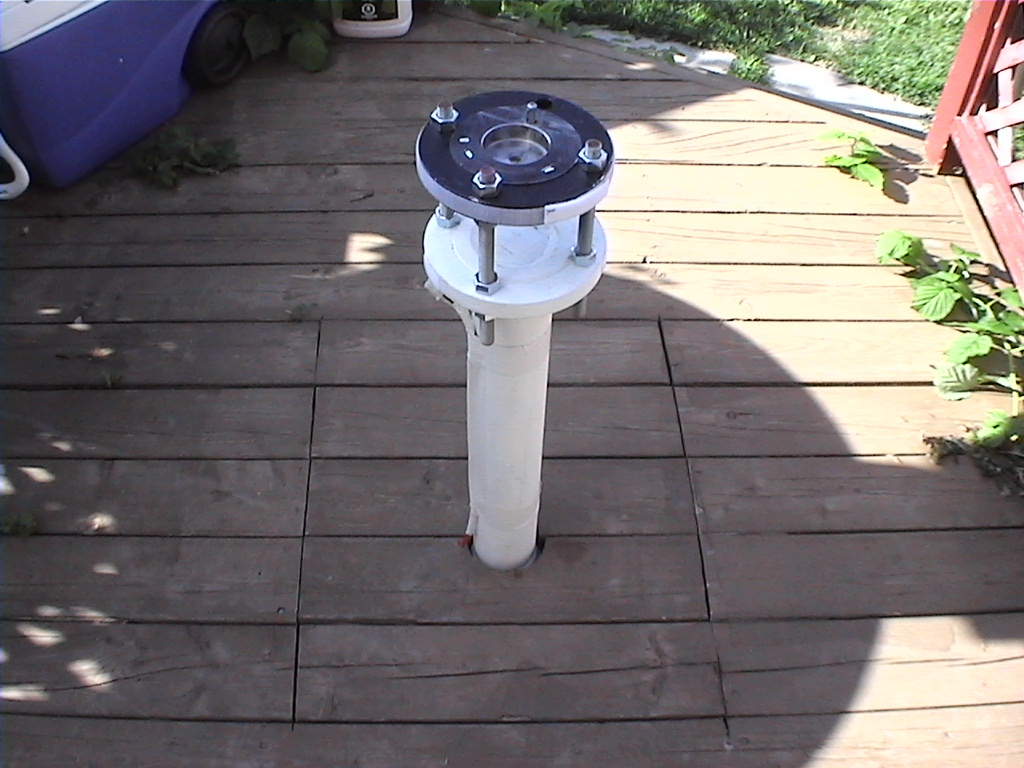
The pier is made of 2 pieces of 3" steel pipe (schedule 40). The below-deck assembly is entirely below deck (coincidence? I think not!), and is topped by a flange just below deck level. This piece has a cap at the lower end, is filled with dry sand, and is fitted with "fins" that were welded on the sides to prevent rotation once set in concrete. It actually looked surprisingly like some kind of heat-seeking missile or something. The upper assembly (painted "Meade" white) has a flange at both ends. It bolts down to the below-deck assembly (flange-to-flange) immediately under the deck planks. The upper piece will detach if we ever move. The top section is also filled with dry sand to prevent ringing.
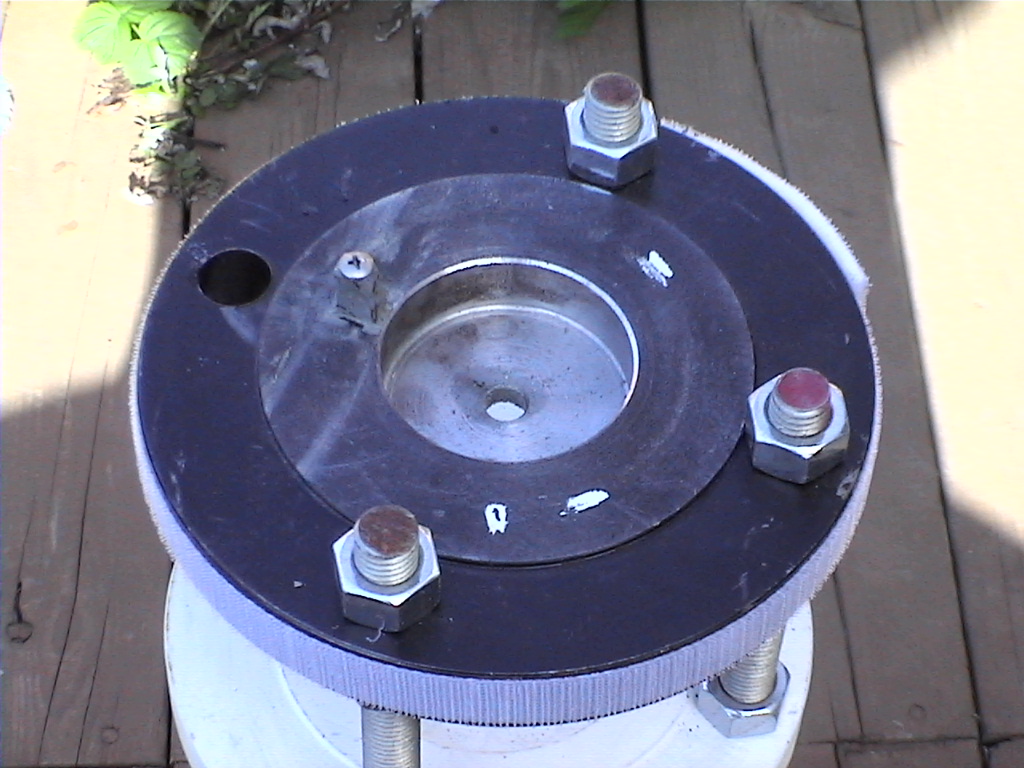
Three 9" pieces of threaded rod are secured through holes in the top flange of the upper assembly (at East,
West, and South sides), and a final "mounting flange" (with a machined 3/4" deep hole to receive the mount)
is secured to the top of these rods (using nuts both above and below). The knob to secure the mount is accessible
from underneath the mounting flange because of the threaded rod. The threaded rod provides a means to level
the mount, and the azimuth adjustment "finger" is merely a 3/16" bolt built up a little with metal-reinforced
epoxy.
Setting up for pouring the concrete (ready-mix) was pretty straightforward, I secured the below-deck assembly in place by bolting the top flange through spacers, to a plank, which I nailed to the deck. Of course, I had to ensure that the flange holes were at the correct offset from magnetic north (about 12 degrees where I live). I also had to make sure that the flange had sufficient clearance BELOW the deck boards to allow the upper assembly to be mounted to it with bolts later on. About 15 bags of concrete later, I was done (in more ways than one).